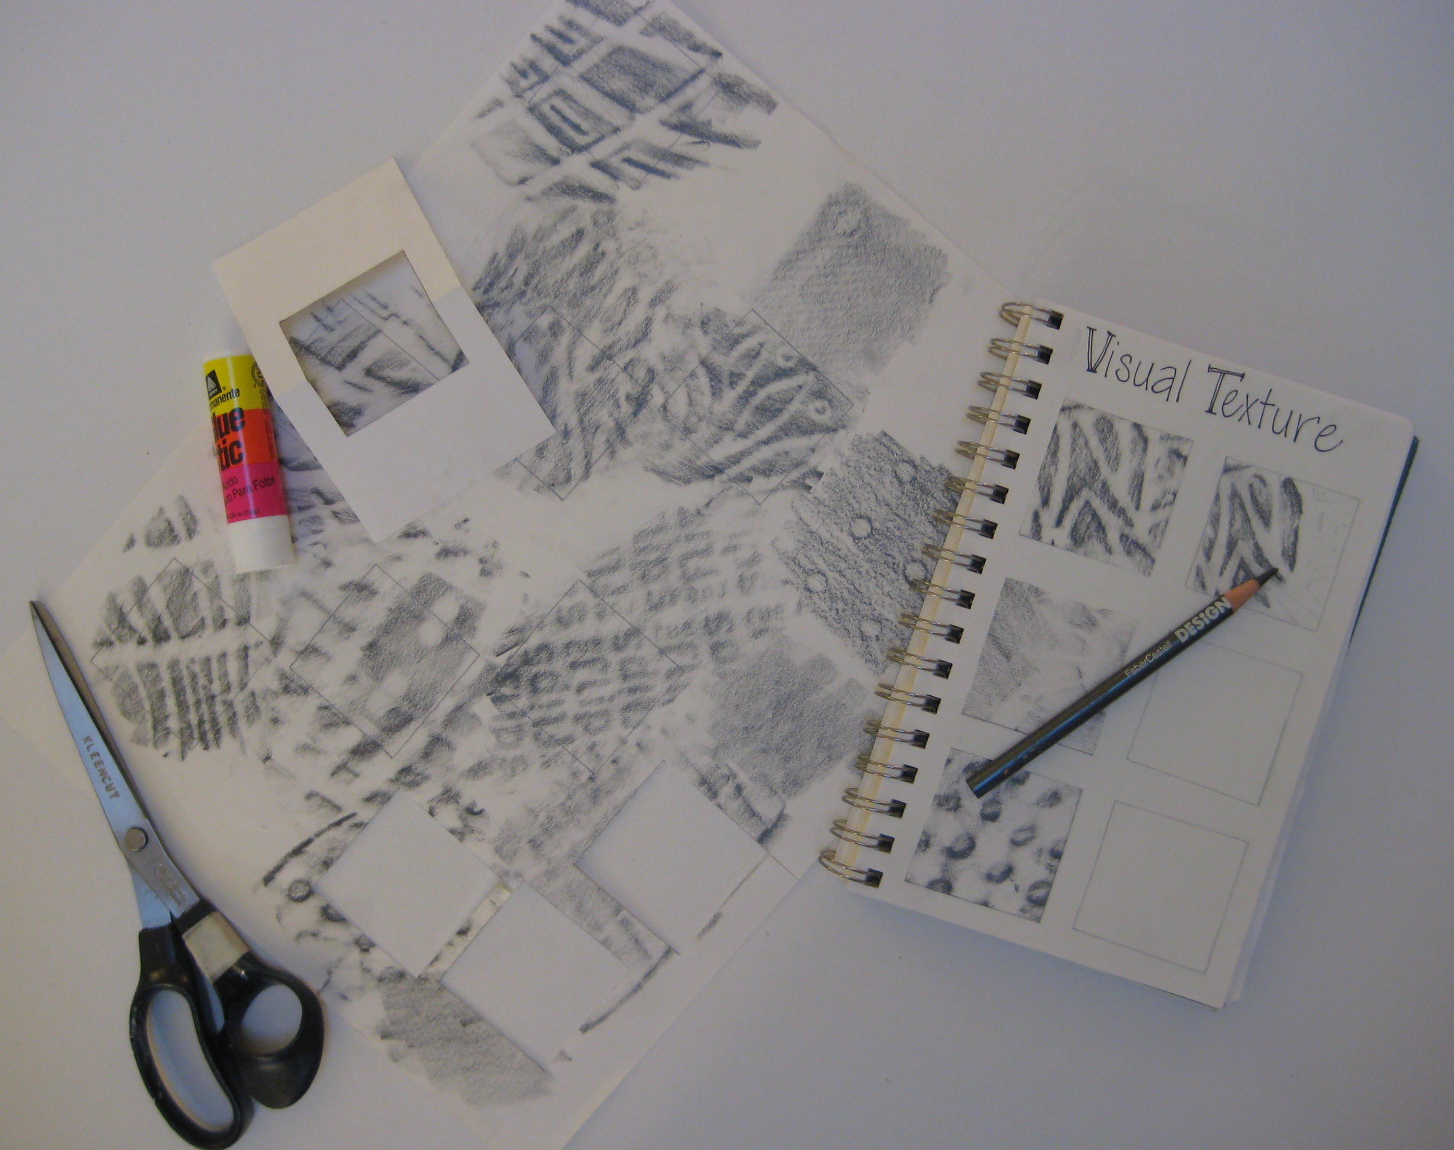
Visual Texture
 This activity is great practice for learning to see values (lights and darks) and duplicate them in your drawings. Younger students may only have the patience to do two or three of these, while older students may want to do several more. Make sure you use the same pencil and the same paper for both the rubbings and the copies, or you’ll have trouble duplicating the lightest and darkest values!
Vocabulary:
Texture – the way something feels
Visual texture – the way something looks like it would feel, duplicated in a 2D medium
Pattern – a repeated design or motif
Value – the degree of lightness or darkness of a color
Materials:
- Drawing paper, 2 sheets (loose or in a sketchbook)
- soft, black drawing pencil (6B or equivalent)
- 3″ x 5″ index card or card stock
- Scissors
- Glue Stick
- Kneaded eraser (optional)
- Blending stump (optional)
- Fixative or hair spray (optional)
 Directions:
1. On one sheet of paper, make a variety of texture rubbings (the bottoms of shoes work great!). Make sure each one is at least 2″ square.
2. Cut a 1-1/2″ square opening in a piece of card stock (I like to fold an index card in half and then cut a 3/4″ x 1-1/2″ opening on the fold). Use this as a template to trace several squares over your rubbings.
3. Then, cut out the squares you traced and glue them down in a vertical column on your 2nd piece of paper (or the next page in your sketch book).
4. Now, use your square template to draw a square across from each of the rubbings that you glued onto your paper.
5. Finally, use the same pencil you did your rubbings with to duplicate each rubbing onto the empty square across from it. Try to match both the pattern and the values as closely as you can. You can use a kneaded eraser to lift out small areas of lighter value. (Important: Make sure you use the same kind of paper and the same pencil for your copies as you did for your rubbings!) When you’re finished, it should be hard to tell which is the original and which is the copy!


This is a great idea! Thanks for sharing. I'm always looking for innovative ways to introduce value. I think this would work great with even my older students!