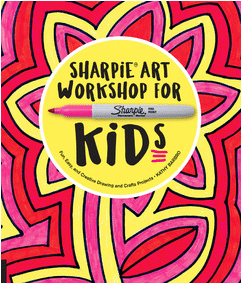
 Exciting news!! I’m honored to be a contributor in Kathy Barbro’s new book, Sharpie Art Workshop for Kids. Kathy writes the popular blog, Art Projects for Kids. It was Kathy’s blog that first inspired me to start my own kids’ art blog many years ago, so that makes this even more exciting for me! You can order Kathy’s new book here.
Sharpies have been a staple on my art supply list ever since I first started teaching. So it’s super fun to see one of my best-loved Sharpie lessons featured on the cover of Sharpie Art Workshop for Kids! 
Today I’m sharing another favorite Sharpie project, colorful No-Measure Mandalas! I use coffee filters for an easy-to-fold circle template and aluminum foil to aid in the tracing and make the colors pop!
Mandalas use radial symmetry to create beautiful circular designs. They are relaxing and fun, and easier to make than you think! Mandalas can be as simple or as detailed as you want. If you follow these steps, you won’t even need a ruler or a compass!
You Will Need:
- Coffee filter (basket style)
- Pencil
- Thin cardboard (8”x 8” minimum)
- Aluminum foil (large enough to cover your cardboard and wrap about 1” over the back)
- Tape (any kind – it will be on the back, so it won’t show!)
- Sharpies (“fine” point, at least 3 colors)
- Smooth out your coffee filter. You can iron it to make it really flat, or stack some heavy books on top to flatten it.
- Once your filter is flat, fold it in half, then in half again, and in half once more.
- Unfold your filter and trace your fold lines with your pencil. Make a dot to mark the center.
- Make a few short lines across one of the folds, from your center dot to the outer edge. For 2nd grade I suggest making 2 lines, 3rd grade: 3 lines, 4th grade: 4 lines, etc. (This will determine the amount of detail in your design.) Making these marks an unequal distance apart will make your design more interesting!
- Using those marks you just made as a guide, mark each fold line to match the first one. No need to measure with a ruler!
- Unfold your filter and connect your marks with curved lines. Now you should have a series of circles centered on your coffee filter.
- It’s time to draw your design! Using your circles as ‘landmarks’, draw one design element at a time, copying it into each section before moving on to the next design element. Remember to keep your design symmetrical.
- Cut a piece of thin cardboard, tagboard or card stock so it’s just a little bigger than your coffee filter.
- Cover your cardboard with aluminum foil and tape the foil to the back.
- Tape your coffee filter to the front, using a few small pieces of tape so it will be easy to remove.
- Use a ballpoint pen to trace the outside edge of your filter and over the design you drew. By using a pen to trace your pencil lines, you’ll be able to easily see where you’ve traced and where you still need to.
- Carefully remove the filter and use Sharpies to color in your design. Keep a piece of scratch paper under your hand while you color to avoid smudging!
(Enter this free drawing to win a signed copy of Sharpie Art Workshop for Kids on Kathy’s Facebook page! For more Sharpie lessons for kids, follow Kathy’s blog roll with her book contributors…. tomorrow’s project will be at MaryMaking!)


I love this Cheryl! Thank you for your kind words and thank you for an amazing project!
I’m glad you like the project, Kathy! Thanks again for including me in this!!
What a Great project and tutorial! Congrats on the cover! :)
Thanks, Mary!
this is brillant…. LOVE
Thank you, Kathy!