TeachKidsArt

a resource for teachers & families

  • Home
  • Blog
  • Artist Birthdays
  • SHOP TPT
  • About
  • Contact
  • TIP Vault

How to Make a Gelli Print

By Cheryl Trowbridge 1 Comment

Share
Pin
Tweet
Print

Monoprint made with a Gelli plate

Gelli plates are a quick, easy, and FUN way to make the most amazing monoprints. Once you experience this process for yourself, you’ll be addicted – like me!

Just follow these simple steps to make your own unique Gelli prints….

You’ll need:

  • Gelli plate (available in 6×6, 8×10, 12×14, and an 8″ cir­cle)
  • Acrylic paints (student or even craft grade is fine – different types of paints will yield different results!)
  • Rubber brayer
  • Materials for layering and texturing (bubble wrap, string, cut paper shapes, rubber bands, etc.)
  • Paper (the same size or a little larger than your Gelli plate – I used plain copy paper, but you can try anything!)
  • Hand sanitizer (for cleaning dried paint from your Gelli plate)
  • Baby wipes (optional, but makes for easy clean-up!)
Supplies for Gelli printing

There are so many ways to print with a Gelli plate… watch this video or follow the steps below to see one way to do it:

Steps for making a Gelli print
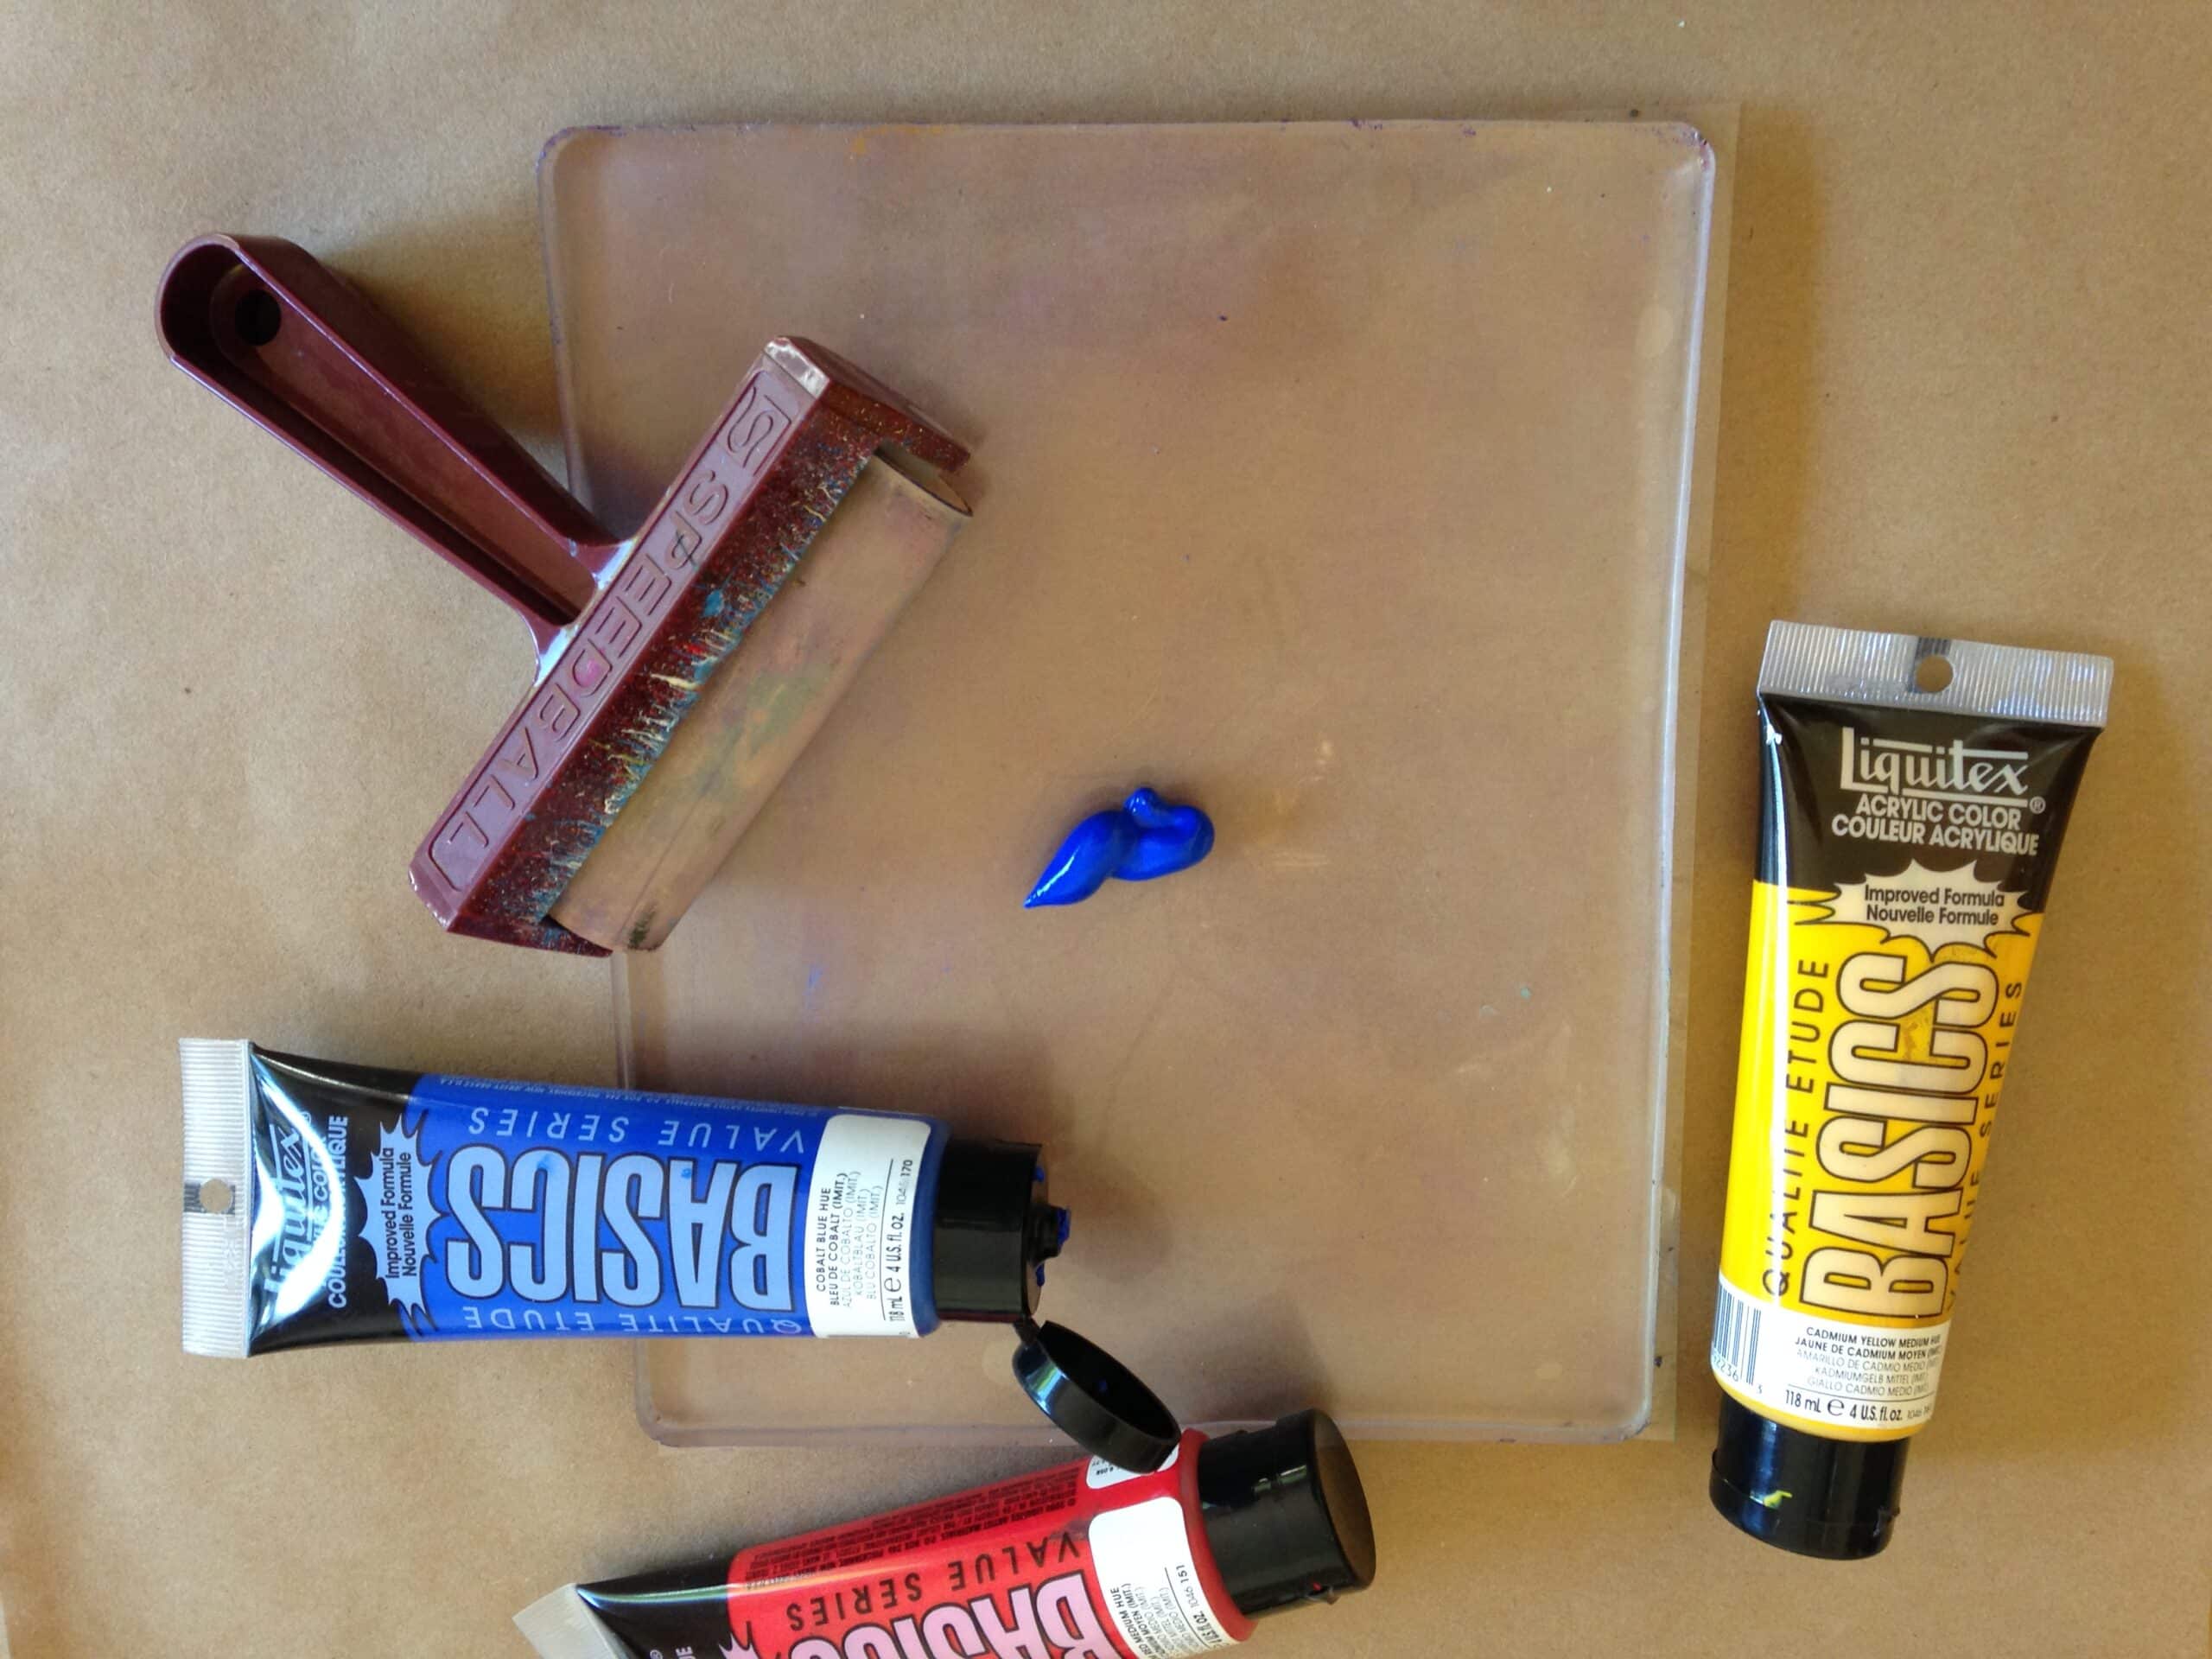
Squeeze out a small amount of acrylic paint. (Note: I experimented with both student grade and artist grade paints, and both work well. You’ll get a slightly different effect with each different paint you try, so play around and see what you like. I also tried tempera paint, but it crawled and wouldn’t stick to the Gelli plate, so I don’t recommend it.)

Steps for making a Gelli print

Spread the paint with a rubber brayer. You can cover your plate all the way to the edges, or apply the paint only where you want it.

Steps for making a Gelli printPress some bubble wrap (or another material for creating texture) onto your Gelli plate, and then remove it.

Steps for making a Gelli printNow lay a piece of paper onto your Gelli plate, rub it well, then carefully peel it off. You’ve made your first print! Work as quickly as you can so your paint doesn’t start to dry.

How to make a Gelli printOne of the best things about Gelli printing is how easy it is to achieve complex-looking effects, simply by working in layers! Here I’m adding some yellow paint to my Gelli plate…. no need to clean the old color off first, unless you want to. Letting the new color mix a little with the previous color will produce even more interesting results!

How to make a Gelli print

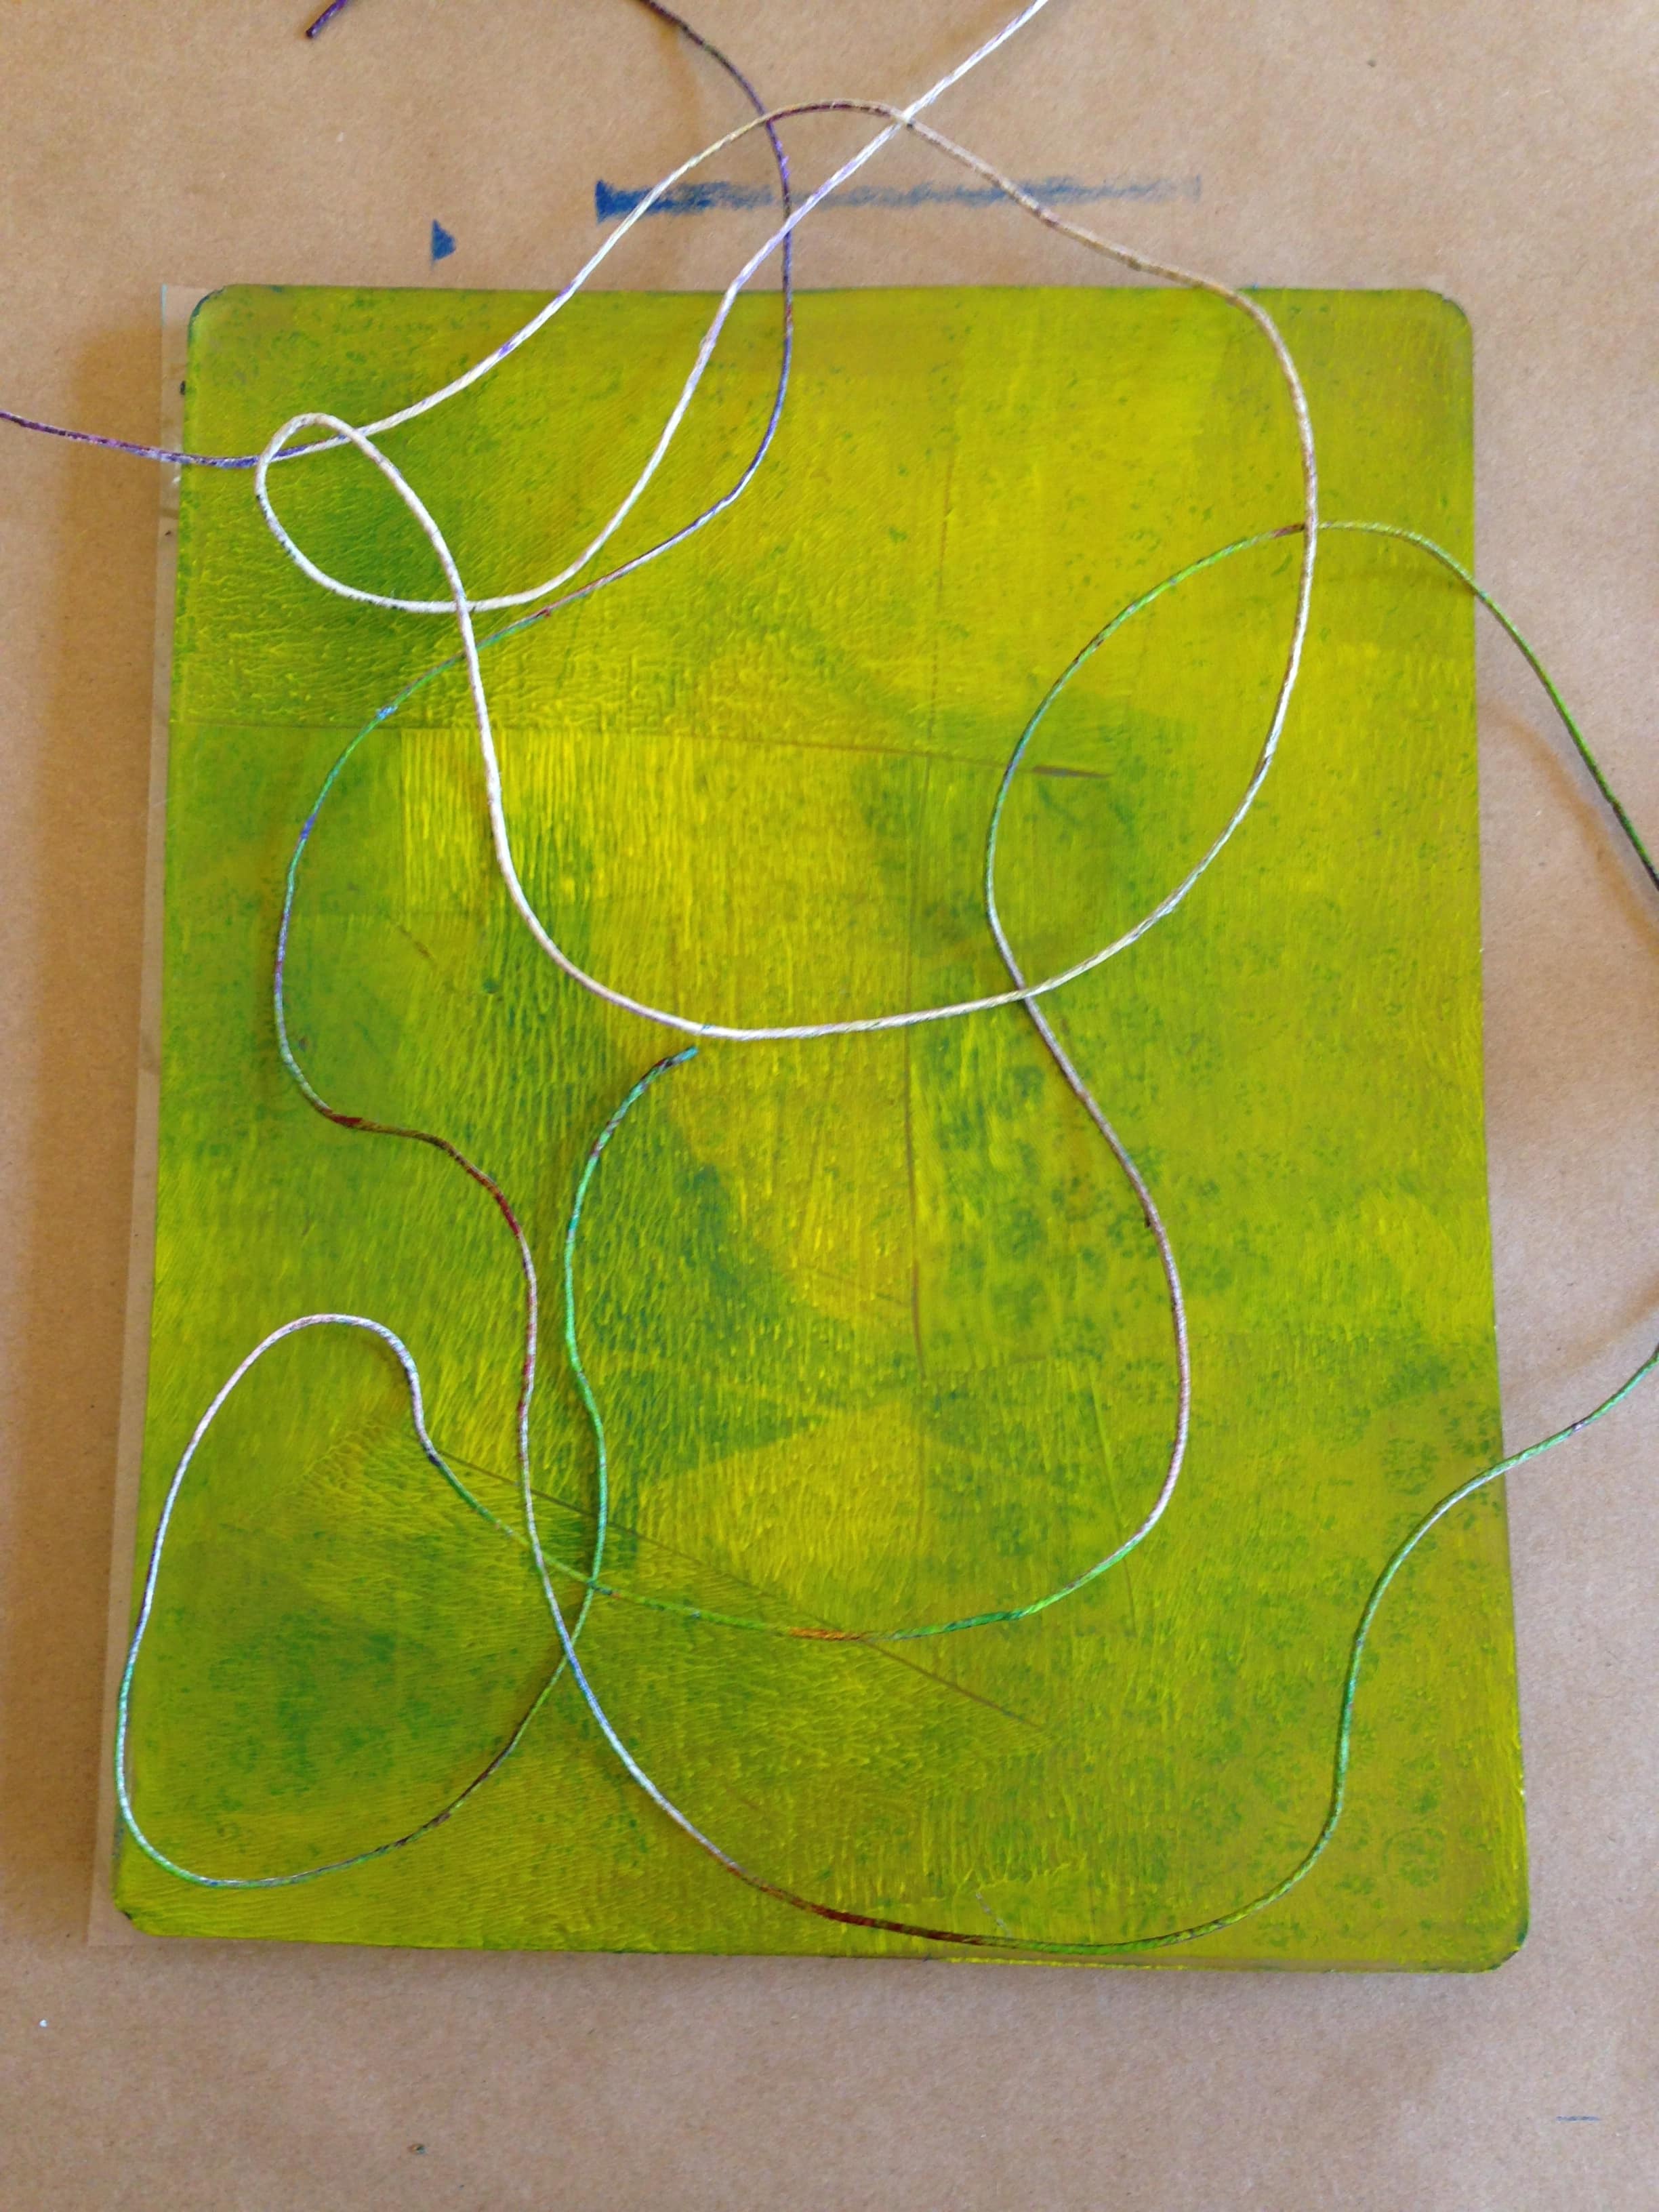
For my next layer, I added some string. You could also cut some shapes out of paper for a resist, or draw with a Q-tip. Just don’t use anything that’s sharp (like a pencil) and may cut into your Gelli plate, or you’ll be seeing that design on all of your future prints!

IMG_5865

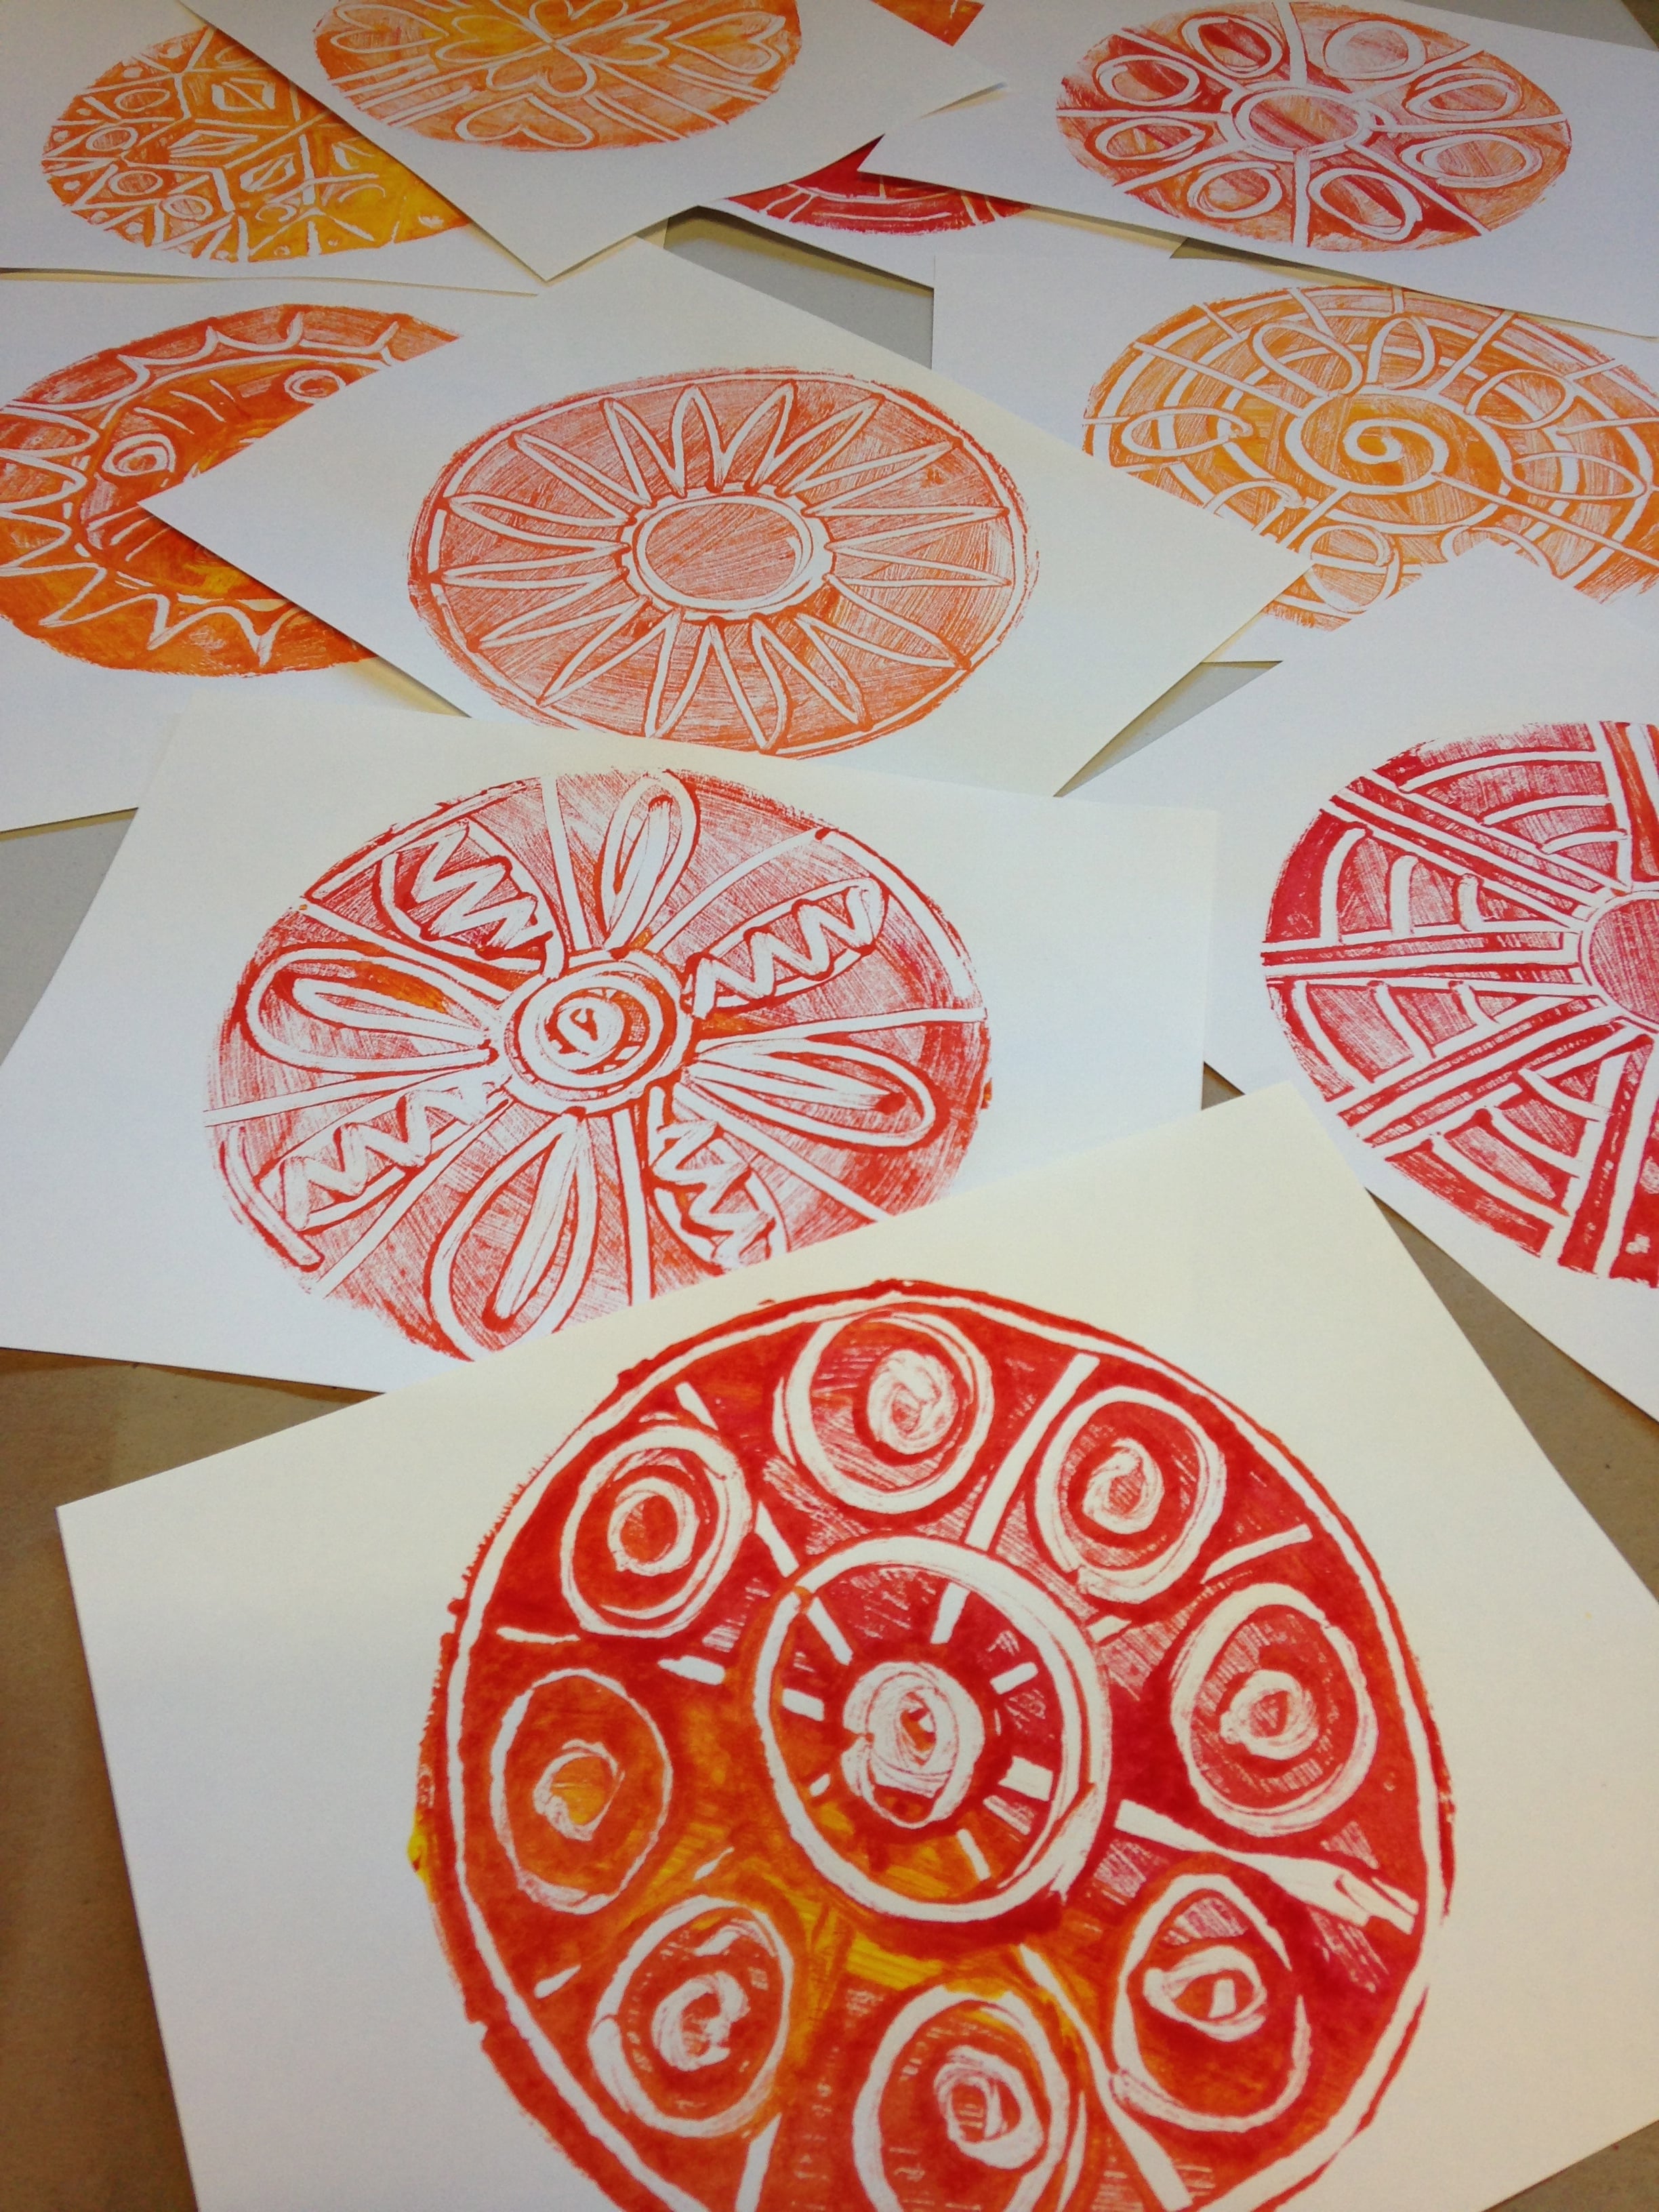
Now, lay your original print on top of your Gelli plate again to add another new layer. Press well, then carefully peel away your print.

How to make a Gelli printWithout re-inking, make a “ghost print” by laying another piece of paper (blank or printed) on top of your plate. Sometimes these ghost prints look even better than the originals!

How to make a Gelli printRepeat this process, making prints and ghost prints, until you have results you’re happy with. There’s no limit to the number of times you can layer prints over a print!

How to make a Gelli printWhen it’s time to clean up, I found baby wipes to be an easy alternative to rinsing my Gelli plate in the sink. Add a squirt of hand sanitizer to loosen any dried-on acrylic paint.

Monoprint made with a Gelli plate

This is just one technique for making monoprints with a Gelli plate. Try experimenting with a variety of materials for layering and adding texture…. or go a different direction and use a brush for a more painterly effect. For more on Gelli printing, see my earlier post, “Making Monoprints with a Gelli Arts Gel Printing Plate”. Imagine all the creative ways you can use these unique prints for backgrounds, collages, and more. The sky’s the limit!

Have you tried Gelli printing?

What ideas do you have for using Gelli prints in the classroom or on your own?


Share
Pin
Tweet
Print

You may also like...

Default ThumbnailMaking Monoprints with a Gelli Arts Gel Printing Plate Default ThumbnailMonoprint Mandalas

Filed Under: Abstract (Non-representational), Acrylic, Lessons, Printmaking, Supplies / Products

Trackbacks

  1. Children art class | How to Finger Knit + MORE | TampaKidsArt Art Classes: Children/Kids/Teen Art Classes and Programs says:
    at

    […] How to Make a Gelli Print […]

    Reply

Leave a Reply Cancel reply

Your email address will not be published. Required fields are marked *

This site uses Akismet to reduce spam. Learn how your comment data is processed.

Follow Me

  • Instagram
  • Pinterest
  • RSS
  • Twitter

Never Miss a Post - Follow by Email

Find a ** FREE ** Lesson (Below):

  • Lessons Inspired by Famous Artists
    • Britto, Romero
    • Burch, Laurel
    • Calder, Alexander
    • Carle, Eric
    • Cezanne, Paul
    • Chagall, Marc
    • Chihuly, Dale
    • Dali, Salvadore
    • Da Vinci, Leonardo
    • Delaunay, Robert & Sonia
    • Escher, M.C.
    • Goldsworthy, Andy
    • Haring, Keith
    • Johns, Jasper
    • Kahlo, Frida
    • Kandinsky, Wassily
    • Klee, Paul
    • Klimt, Gustave
    • Matisse, Henri
    • Miro, Joan
    • Mondrian, Piet
    • Monet, Claude
    • O’Keeffe, Georgia
    • Old Masters
    • Picasso, Pablo
    • Pollock, Jackson
    • Pompon, Francois
    • Posada, Jose
    • Remington, Frederick
    • Renoir, Auguste
    • Seurat, Georges
    • Seuss, Dr.
    • Van Gogh, Vincent
    • Van Honthorst, Gerard
    • Wood, Grant
  • Lessons by Holiday
    • 100th Day of School
    • Chinese New Year
    • Christmas
    • Day of the Dead / Dia de los Muertos
    • Earth Day
    • Easter
    • Father’s Day
    • Halloween
    • International Dot Day
    • Memorial Day
    • Mother’s Day
    • New Years
    • Other
    • Thanksgiving
    • Valentine’s Day
  • Lessons by Culture
    • Africa
    • America
    • Chile
    • China
    • Europe
    • Haiti
    • Japan
    • Mexico
    • Middle East
  • Lessons by Process
    • 3D / Sculpture
    • Bookmaking
    • Calligraphy
    • Collage
    • Drawing
    • Embossing
    • Folding
    • Lettering
    • Micrography
    • Mosaic
    • Origami
    • Painting
    • Paper Cutting
    • Paper Folding
    • Printmaking
    • Quilling
    • Recycling with Art
    • Sketching
    • Stitching / Embroidery
    • Weaving
  • Lessons by Medium
    • Acrylic
    • Clay
    • Colored Pencil
    • Crayon
    • Digital / Computer
    • Fabric / Fiber
    • Markers / Pen and Ink
    • Mixed Media
    • Oil Pastel
    • Paper
    • Pencil
    • Tempera
    • Watercolor
  • Lessons by Style
    • Abstract (Non-representational)
    • Abstract (Representational)
    • Cartoon
    • Cubism
    • Expressionism
    • Fantasy
    • Impressionism
    • Op Art
    • Orphism
    • Pointillism
    • Pop Art
    • Post Impressionism
    • Realism
    • Surrealism
  • Lessons by Subject
    • Abstract Design
    • Animals
    • Birds
    • Buildings
    • Butterflies
    • Cityscape
    • Color / Color Mixing
    • Creatures / Monsters
    • Cross
    • Faith
    • Elements of Art
    • Fish / Marine Life
    • Flowers
    • Greeting Cards
    • Hearts
    • Imagination
    • Landscape
    • Mandalas
    • Masks
    • Math with Art
    • Misc. Subjects
    • Names
    • Nature
    • Ocean / Seascapes
    • People
    • Portraits / Self-Portraits
    • Religion
    • Quilts
    • Scripture
    • Seasons
    • Sky
    • snow
    • Stars
    • Still Life
    • Trees
    • Words / Letters
  • … and More!
    • Bulletin Boards & Displays
    • Classroom Management
    • Elements of Art
    • Imagination
    • Inspiration
    • Middle School Art
    • News & Announcements
    • Philosophy
    • Portfolios
    • Product Reviews
    • Quotes & Stories
    • Supplies / Products
    • Teacher Workshops
    • Tips for Teaching Art

Follow me on
Teachers Pay Teachers

Support Teach Kids Art When you shop Amazon.com

TEACH KIDS ART IS AN AMAZON AFFILIATE. I earn a small commission when you visit Amazon.com by clicking through my site and make a purchase of any kind. This supports Teach Kids Art at no extra cost to you.

Click here to shop Amazon.com!

Related Posts

  • TIP #65: 12 Positive Affirmations for Creative Kids
  • Review the Elements of Art with a Beachball Scavenger Hunt
  • Make a Crazy Crown Craft
  • Use Art Postcards to Teach or Review
  • How to Have an Elements of Art Scavenger Hunt in a Painting

Copyright © 2023 Cheryl Trowbridge / Teach Kids Art · All Rights Reserved · Privacy Policy · Design by Laugh Eat Learn


We use cookies on our website to give you the most relevant experience by remembering your preferences and repeat visits. By clicking “Accept”, you consent to the use of ALL the cookies.
Cookie settingsACCEPT
Privacy & Cookies Policy

Privacy Overview

This website uses cookies to improve your experience while you navigate through the website. Out of these, the cookies that are categorized as necessary are stored on your browser as they are essential for the working of basic functionalities of the website. We also use third-party cookies that help us analyze and understand how you use this website. These cookies will be stored in your browser only with your consent. You also have the option to opt-out of these cookies. But opting out of some of these cookies may affect your browsing experience.
Necessary
Always Enabled
Necessary cookies are absolutely essential for the website to function properly. This category only includes cookies that ensures basic functionalities and security features of the website. These cookies do not store any personal information.
Non-necessary
Any cookies that may not be particularly necessary for the website to function and is used specifically to collect user personal data via analytics, ads, other embedded contents are termed as non-necessary cookies. It is mandatory to procure user consent prior to running these cookies on your website.
SAVE & ACCEPT