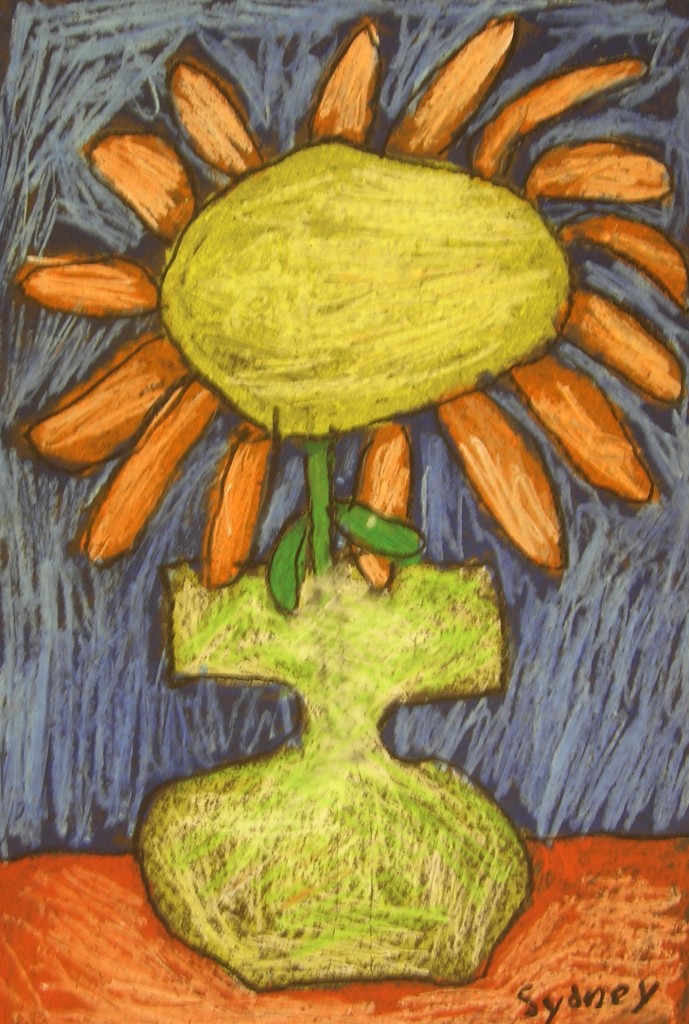
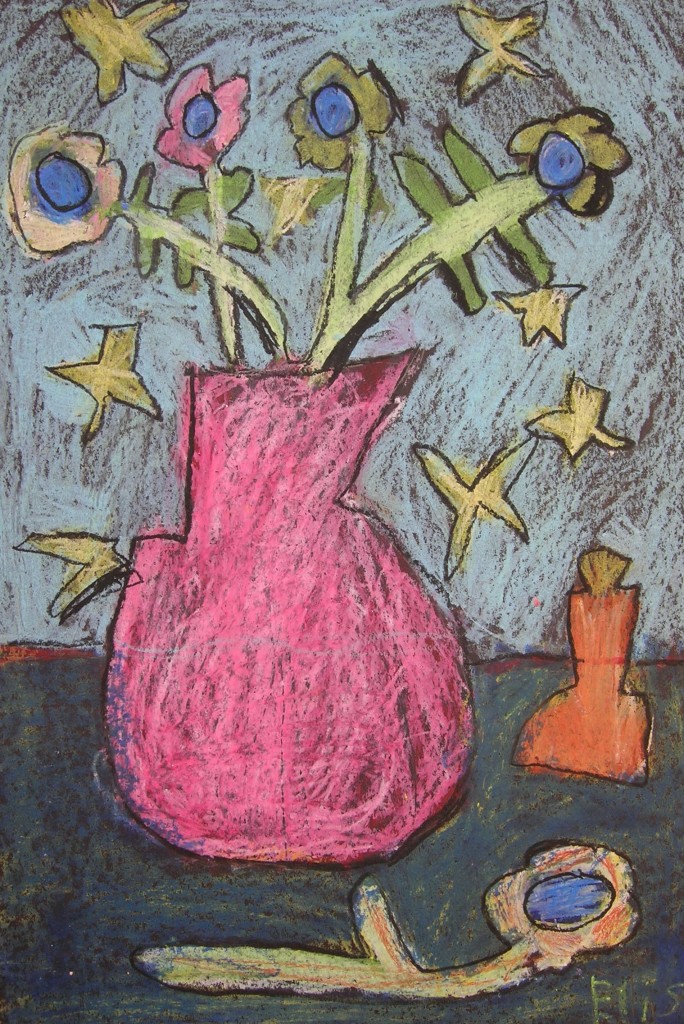
Oil Pastel Still Life Inspired by Vincent Van Gogh
 Students will be surprised to learn that Van Gogh was not popular as an artist during his own lifetime…. a great example that the opinions of popular culture do not always prevail! This project usually takes 2-3 fifty minute sessions to finish, and the results are frame-worthy!
Vocabulary:
• Vincent Van Gogh (1853-1890) – Dutch painter Vincent Van Gogh is one of the best known and most beloved artists of our day, yet in his own lifetime he sold only one painting. He tried many different careers and didn’t actually start painting until the last ten years of his life. Most of his paintings were done in his last five years, and in his last three years he was completing almost a painting a day!
• Post Impressionism – an art movement which began in the late 19th century, adopting some ideas of the Impressionist movement (vivid colors, thick application of paint, distinctive brushstrokes and real-life subject matter), but exploring further the use of color, line, form and emotion, eventually leading to the development of Expressionism.
Materials:
• 12×18 black construction paper
• Pencil with eraser
• Wet wipes for clean up (my students object to me calling them “baby wipes”, but hey, that’s really what they are!)
• Photos or line drawings of a variety of flowers (Calendars are a great source for flower photos, and if sunflowers are in season, I’ll bring in a real one… but if not, I have a silk flower version that works just as well.)
• Examples of Van Gogh paintings (from books, calendars or the internet)
Directions:
1. Talk about the fascinating life of Vincent Van Gogh and show examples of his paintings (especially his sunflowers), pointing out his expressive brush strokes.
2. Show examples of a variety of vase shapes. These can be photographs or just quick sketches. (I like to just demo some simple symmetrical shapes on the white board – any kind of “vertical” line on the left with a “mirror image” line across from it on the right, then straight horizontal lines connecting them at the top and the bottom.)
3. Using the eraser on the end of your pencil, sketch your basic layout: a simple vase with one or more flowers (I let them choose what kind of flowers they want to draw) and a horizontal line behind the vase to indicate the table it’s sitting on. Just sketch simple shapes – no details yet!
4. Use a white oil pastel to lightly trace over your eraser lines.
5. Now fill in your painting with at least two layers of color everywhere. Don’t use any black yet – we’re saving that for last! You can add a layer of white to brighten any color. Try making your “brushstrokes” look expressive, like Van Gogh did. (Follow these tips for success with oil pastels!)
6. Make sure your entire paper is covered with at least two layers of color. Then outline each separate shape with black oil pastel. (Have students raise their hand to get permission to outline – check that they’ve used at least two layers of color everywhere.)
7. Sign your name with black in the lower right corner.
After collecting artwork and putting oil pastels back in their box, give each student a “wet wipe” and have them first clean their hands and then wipe off their desk. Wet wipes are the best for cleaning oil pastel off of hands and desks!

Visit Teach Kids Art on Facebook to see more of these charming examples of student work!
You can download a FREE pdf of this lesson at my Teachers Pay Teachers store!