Bookmaking | Japan | Lessons | Multicultural | Origami | Paper
Origami Lotus Book

Here’s a fun project that both kids and adults really get excited about! The Lotus Book may look complicated, but its folds are actually very simple. Don’t be intimidated by all the steps…. once you’ve made one you’ll have it down. It’s so much easier than it looks!
Materials:
-
Heavy-weight paper or card stock for pages (5 pieces, 8½” x 8½”)
-
Heavy-weight paper or card stock for cover (2 pieces, 4¼”x 4¼”)
-
YES! Paste (or Avery permanent glue stick – works okay, but not as permanent as the YES! Paste)
-
Paper plate, cut into quarters, for holding a glob of paste
-
Popsicle stick for creasing folds and spreading paste
-
Flat shoelaces, one 36” lace per book (or any flat ribbon, seam binding, etc.)
Directions:
First, fold all of your pages….

Start with your first square of paper and fold it in half, matching the top and bottom edges.
(A popsicle stick works great for creasing folds, especially for small hands!)

Then unfold and fold in half again, matching the side edges. Both of these folds are “valley folds”.

Now unfold your paper and turn it over. (Your “valley folds” just became “mountain folds”.)

Next, fold your paper in half once, diagonally (valley fold), matching corners carefully.

Unfold your paper again and turn it over again so that the diagonal fold is pointing upward (mountain fold). Then press down on the center where the three folds cross. The diagonal folds on each side of the center will pop up.

Gently push the two diagonal folds together so that they meet in the middle.

Press down (it should look like a square again) and crease all folded edges well.
Repeat these steps with your remaining four pages.

Now it’s time to assemble your pages. (You’ll be working from back to front, so keep that in mind if you’ve already written or drawn on your pages. If not, the order doesn’t matter!) Spread YES! Paste over the top of one page and press the next page onto it, matching folded corners to folded corners and loose edges to loose edges. Repeat this step until all five pages are glued together in a stack. Open and close your book a few times to make sure you have it glued together correctly!

Spread YES! Paste over the top of your stack of pages. Then lay the shoelace diagonally over the glued area, with the mid-point of the shoelace over the folded corners, and the extra length hanging below the corner with the loose edges. Dab a little extra paste on top of the shoelace.
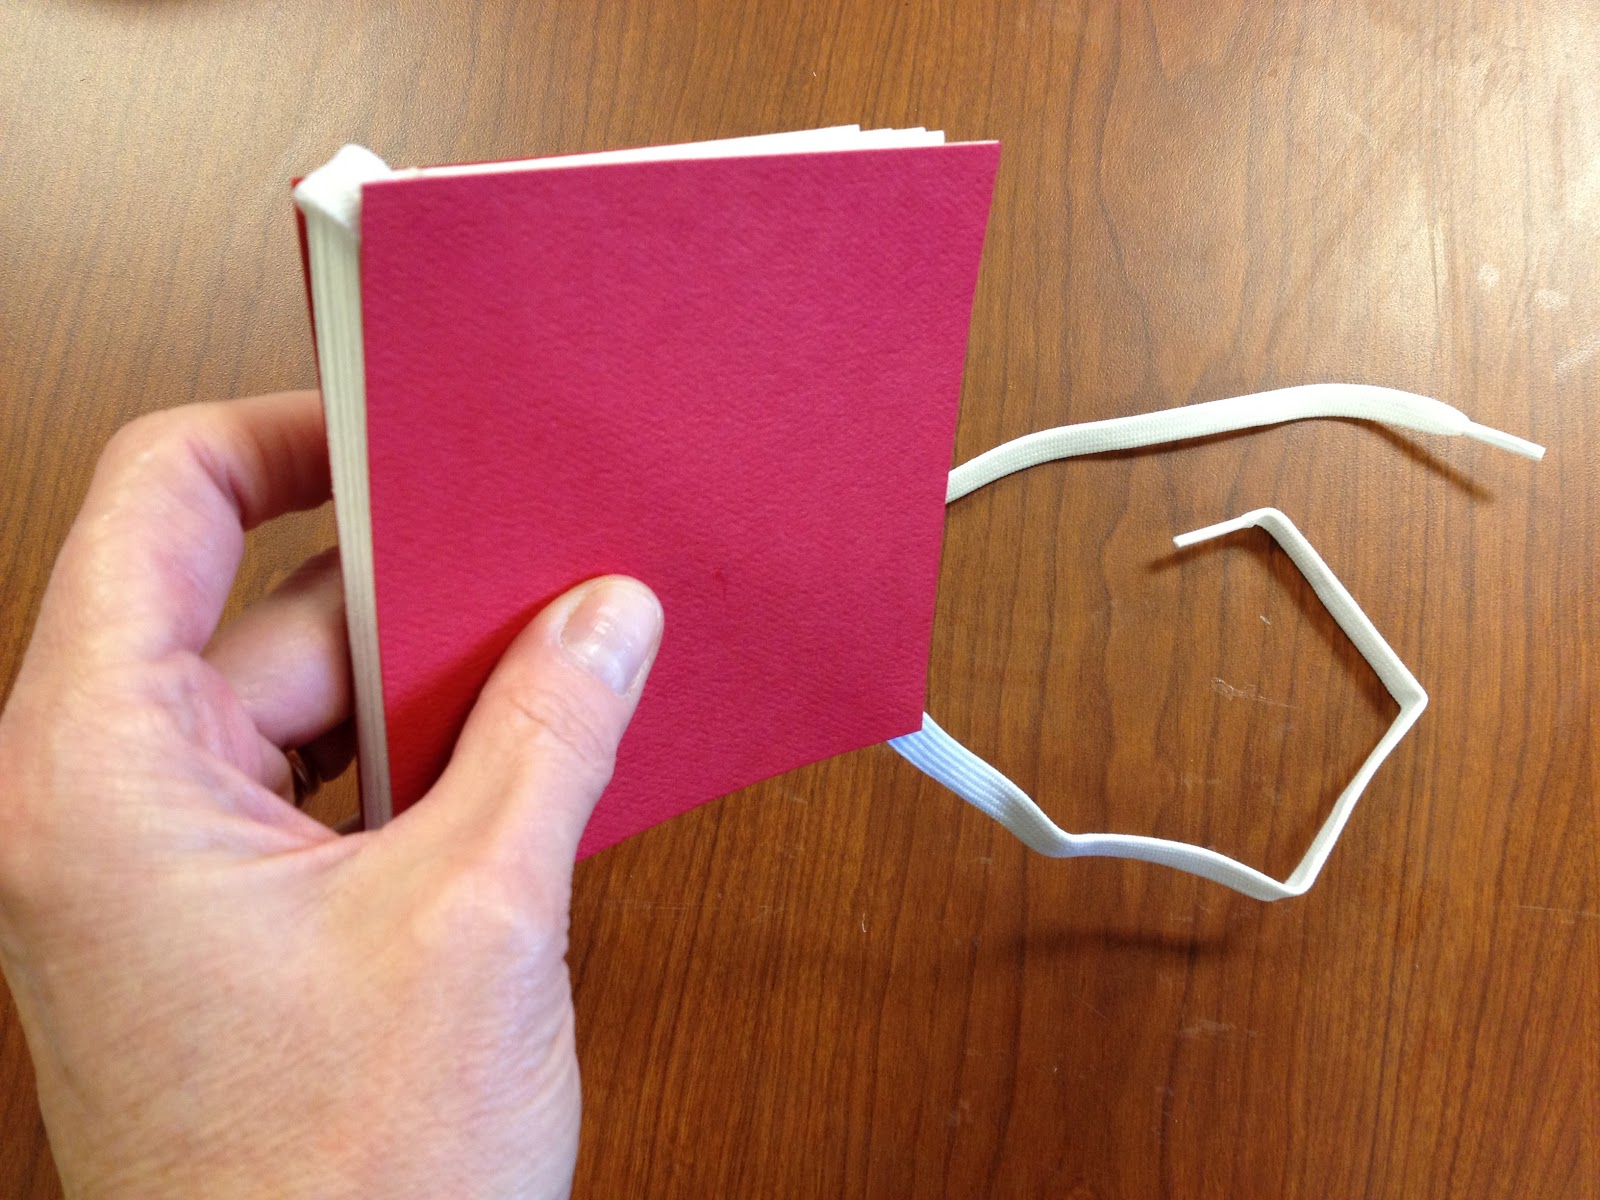
Press one of your cover papers on top. Then turn your book over and repeat the last step with glue, shoelace and cover on the back.
Open and close your book a few times to make sure your pages aren’t sticking together where they’re not supposed to! (A baby wipe or damp paper towel works great for wiping off any stray paste!)

Close your book and set something heavy on it while it dries.
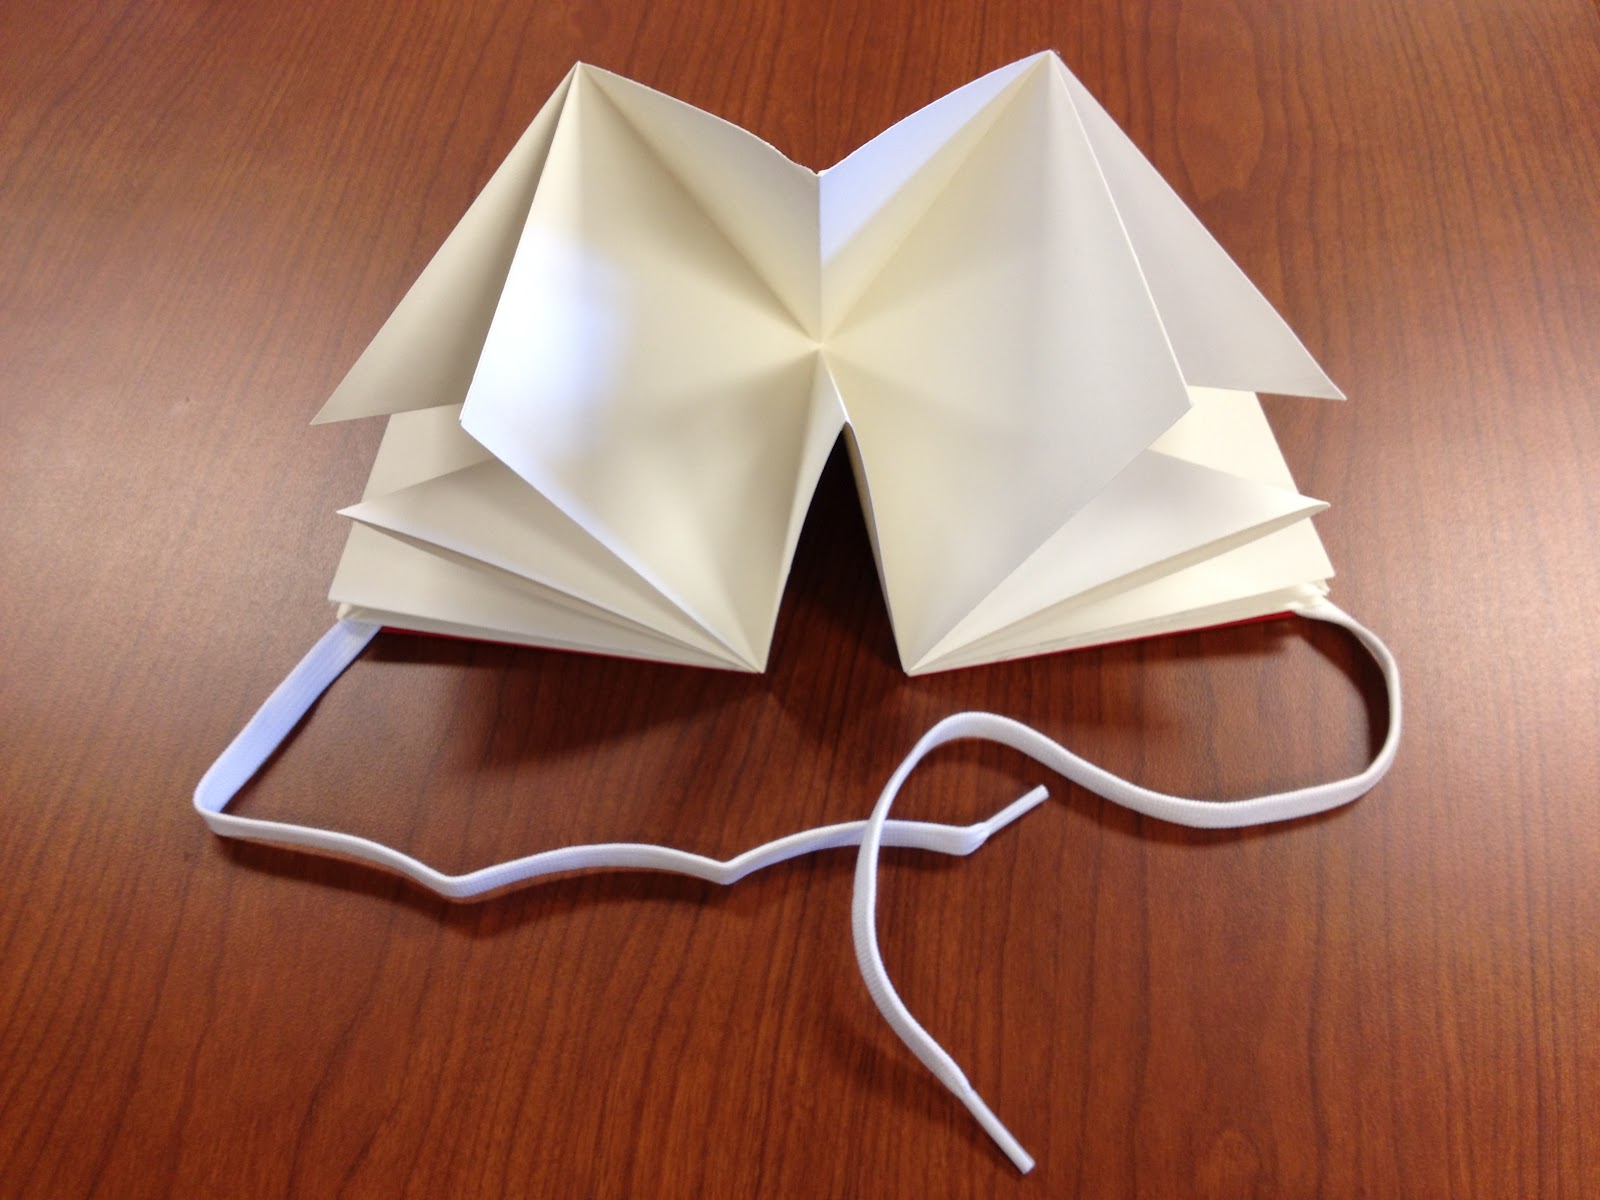
Open your completed book and marvel at its amazing shape! (A photo really doesn’t do it justice!)

These fold-out pages present a unique place for poems, jokes, riddles, or interesting facts about people, places or events. You can also use Lotus Books to create one-of-a-kind book reports, using the five-page format to summarize and illustrate key events from the (1) setting, (2) rising action, (3) climax, (4) falling action and (5) resolution of a story. Or simply fill them with colorful drawings and designs…. the sky’s the limit!


Fabulous! I have always been intimidated by book art. Your super photos and instructions make it look possible. Thanks for posting.
This is a great thing to do with the kids ! Thank you for this simple description.
Great project to do with kids! My love for origami comes from when I was about 10 years old and I learned how to do a bird that flap it's wings….and I shared that one with my students….it's always a great success.
H I am Maryana and I am a 5th grade student. I also have a blog that I think may be useful to you if you need ideas. check it out! http://iheartartmaryana.blogspot.com/
I love this. Thanks for the tutorial!
Susanne, this is one of those projects that is remarkably easier to do than it looks. Once you’ve done it a couple of times, you could almost do it in your sleep! They are so much fun to make and the applications are endless! I hope you enjoy making them, too!!
is it possible to illustrate how to pre enter words so that one can do the book with quotes inside?
anyone tried this?
Teena, it’s easy to add words or pictures before you glue your book together, if you prefer to do it that way. Just make all your folds and lay the pages together like you would if you were gluing it. Then you’ll be able to tell where things need to go. I’ve also used Post-It Notes to label the pages as to what goes where and which direction it should go. Just double check it all before you glue it!